Clinical examination is a cornerstone of healthcare, allowing medical professionals to gain valuable insights into a patient’s health.
Here we will dig into the intricate process of examining the chest, encompassing inspection, palpation, percussion, and auscultation.
These techniques reveal valuable information about the respiratory system and underlying conditions.
Respiratory problems are very common in medical practice.
Examples: Rhinitis, Pharyngitis, Tonsillitis, Laryngitis, Bronchitis, Pneumonia, Bronchial Asthma, Bronchiectasis, Emphysema, TB.
Let’s get started,
Table of Contents
ToggleSITTING POSITION
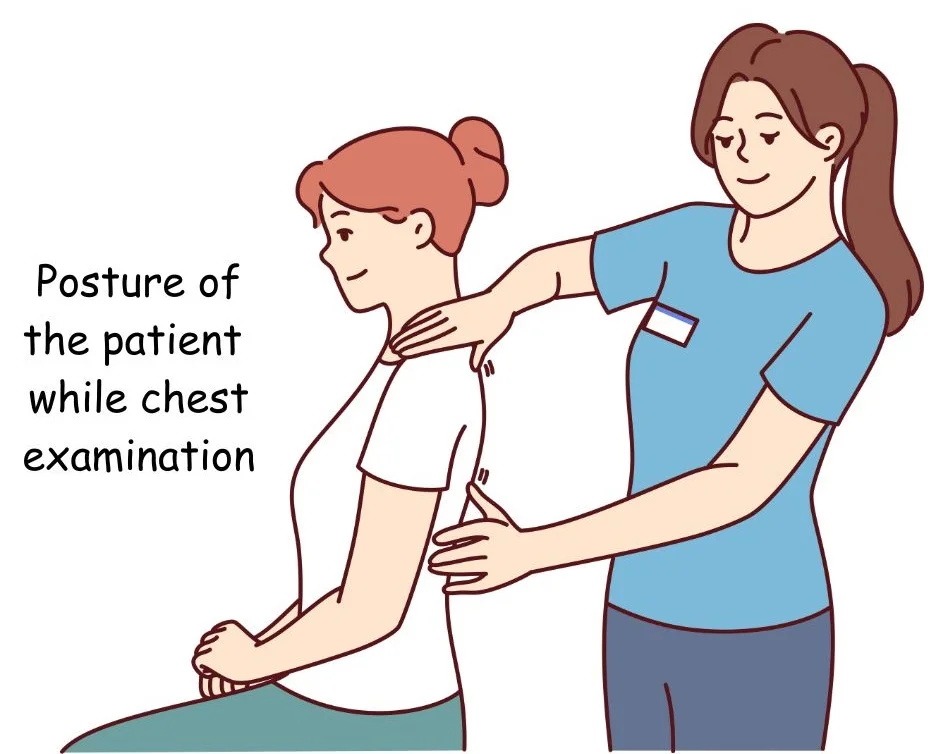
The examination starts with the patient undressed from the waist up and positioned in a well-lit area to facilitate a comprehensive inspection.
It’s crucial to note that assessing the back of the chest is equally important.
The examination comprises two main parts: the Upper Respiratory Tract (URT) and the Lower Respiratory Tract (LRT), each requiring a thorough evaluation.
- Upper Respiratory Tract (URT) Examination includes:
- Nose
- Oral cavity
- Throat
- Larynx
- Lower Respiratory Tract (LRT) Examination focuses on:
- Chest
- Traches
- Bronchi
- Lungs
Both URT and LRT assessments are essential to gain a comprehensive understanding of the patient’s respiratory health and identify any potential issues.
EXAMINATION OF UPPER RESPIRATORY TRACT
EXAMINATION OF NOSE
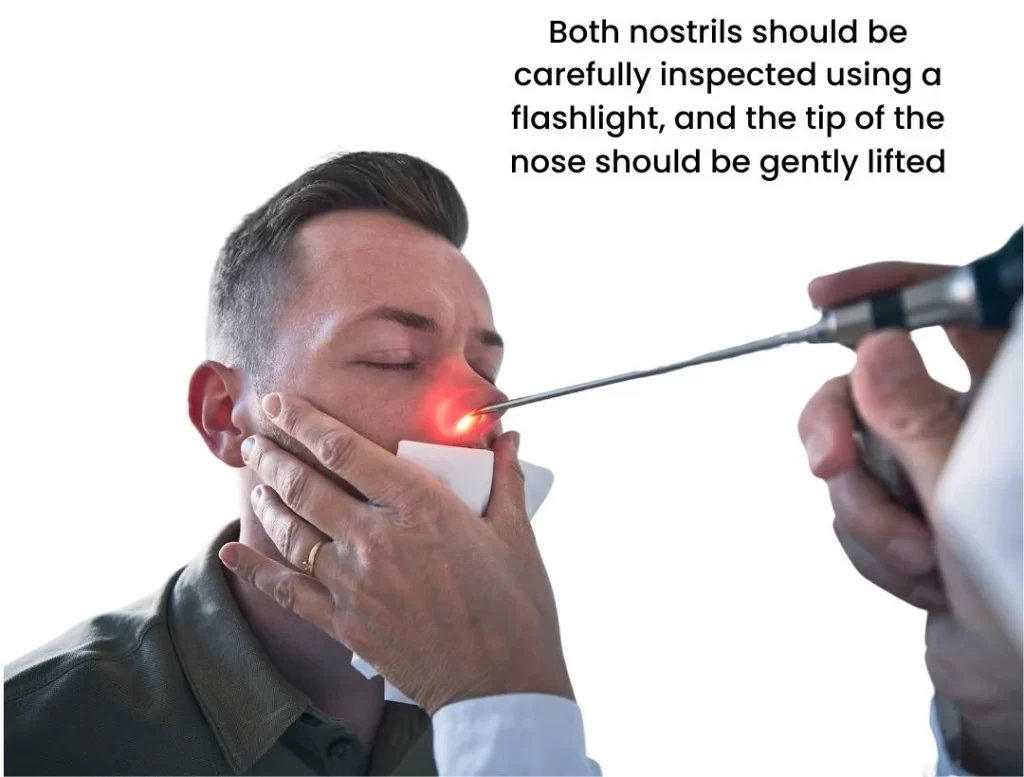
- During the examination, both nostrils should be carefully inspected using a flashlight, and the tip of the nose should be gently lifted to view the nasal septum. Here are the specific things to look for:
Mucous Membrane: Examine the mucous membrane inside the nostrils. Check for any abnormalities or irregularities in its appearance.
Discharge: Note if there is any discharge present. Pay attention to the characteristics of the discharge:
- Colour: Observe the colour of the discharge. It can be white, yellow, green, or even contain traces of blood. Yellow or green discharge may indicate an infection and might require antibiotics.
- Consistency: Determine whether the discharge is watery, mucoid, or muco-purulent (containing both mucus and pus).
- Water: In cases of suspected allergies, watch out for clear, watery discharge. This type of discharge is often associated with allergic conditions.
ORAL CAVITY AND PHARYNX EXAMINATION

- Patient Position: Begin by asking the patient to open their mouth and say “Aaaa” with protrusion on tongue. This helps in assessing the oral cavity and pharynx.
- Comprehensive Examination: Perform a thorough examination of the following areas:
- Tongue: Check the condition and appearance of the tongue.
- Teeth: Inspect the teeth for any issues or abnormalities.
- Gums: Examine the gums for redness or other signs of irritation.
- Cheeks: Observe the inner cheeks for any irregularities.
- Pharyngeal Wall: Assess the pharyngeal wall at the back of the throat.
- Tonsillar Fossae: Inspect the tonsillar fossae or the areas around the tonsils.
- Uvula Position: Note the position of the uvula, the small, fleshy piece hanging at the back of the throat.
- Pharyngeal Arches: Examine the pharyngeal arches in the throat.
- Abnormalities: Look for any abnormalities or signs of concern such as:
- Redness: Check for redness or inflammation in any of these areas.
- Secretions: Observe if there are excessive secretions or mucus in the oral cavity or pharynx.
- Patches: Look for any unusual patches or spots on the mucous membrane.
- Leucoplakia: Specifically, check for white patches, which can be a pre-malignant condition often associated with tobacco chewers.
- Diphtheria: Examine for whitish patches that may be indicative of diphtheria, a bacterial infection.
LARYNX EXAMINATION
Laryngeal examination can be conducted in two ways:
- Direct Laryngoscopy: In this method, a specialized instrument called a laryngoscope is used to directly visualize the larynx. This provides a clear and close-up view of the larynx and vocal cords.
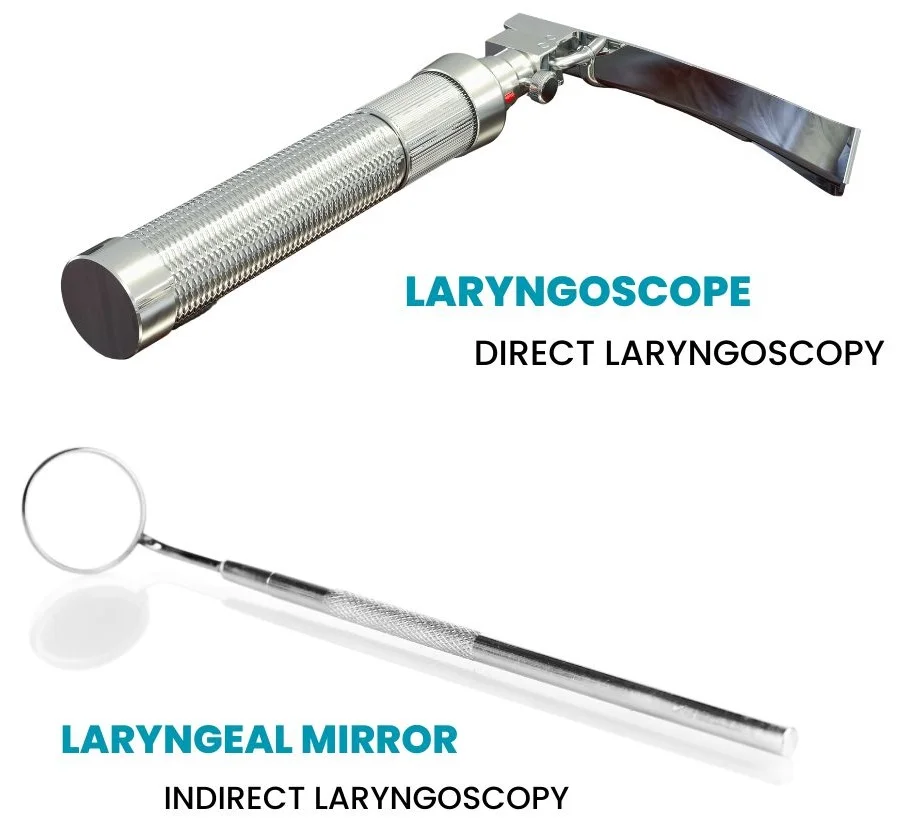
- Indirect Laryngoscopy: This method involves the use of mirrors and indirect lighting to visualize the larynx. It allows for an examination of the larynx without the need for a direct instrument insertion.
Both methods are employed to examine the larynx thoroughly, checking for any abnormalities, lesions, or issues with the vocal cords or surrounding structures.
INSPECTION: OBSERVING THE CHEST
Surface Markings
Inspect the entire chest for any marks or spots.
Scars: Check for marks that might show past surgeries. Pay close attention to the mid-axillary lines for signs of previous chest-drains.
Radiotherapy Effects: Radiotherapy can cause lasting changes like thicker skin and redness in a specific area.
Veins: Look for any veins that seem more visible than usual on the chest’s surface.
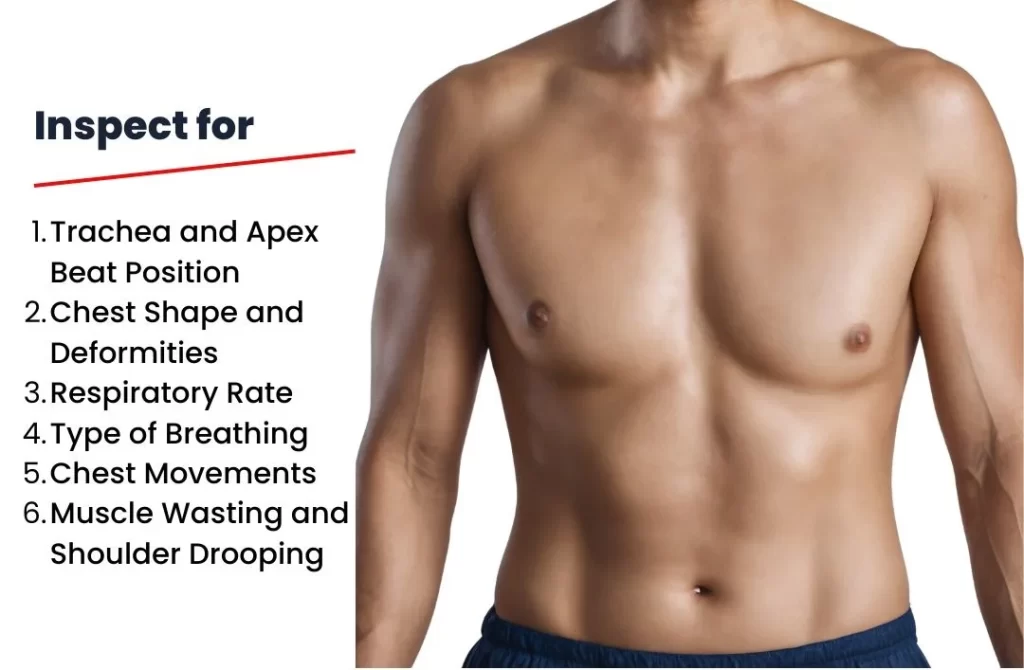
During this assessment, the following key observations are carefully recorded:
- Trachea and Apex Beat Position: The precise location of the trachea and the apex beat of the heart is examined.
- Chest Shape and Deformities: The shape of the chest is scrutinized for any irregularities or deformities.
- Respiratory Rate: The rate at which the subject is breathing is carefully counted.
- Type of Breathing: The manner in which the subject is breathing is categorized, such as normal, shallow, or laboured.
- Chest Movements: The movements of the chest during breathing are observed, paying close attention to any asymmetry or abnormal patterns.
- Muscle Wasting and Shoulder Drooping: Any signs of muscle wasting or drooping of the shoulder are noted.
In a typical examination, the chest exhibits bilateral symmetry, although its shape may vary based on the individual’s build.
For instance, in individuals with a sturdy build, the chest tends to be short, broad, and deep, whereas it appears long, narrow, and flat in tall, slender individuals. In cases of emphysema, the chest may assume a barrel shape.
In terms of cross-sectional proportions, a normal chest typically has an elliptical shape, with the anteroposterior diameter compared to the lateral diameter in a ratio of approximately 5:7.
Further observations include assessing the rhythm, rate, and type of respiration.
In most adults, breathing follows a regular rhythm, and it is characterized as abdominothoracic.
Read here an interesting post on ABDOMINOTHORACIC BREATHING by following the link.
However, in young children and women during pregnancy, it may be thoracoabdominal.
Lastly, the expansion of the chest is evaluated, with particular attention to ensuring symmetry between both sides.
Read here THE THORACOABDOMINAL BREATHING.
What is the difference between thoracoabdominal and abdominothoracic breathing?
PALPATION: EXAMINING THE CHEST
During palpation, we assess various aspects of the chest and its underlying structures. This hands-on examination involves the following steps:
Mediastinal Position
- We start by determining the position of trachea.
- To do this, we use index finger and ring finger, placing them on the bony prominences of suprasternal notch (the hollow area just above sternum).
- Next, the middle finger is gently pushed backward and downward between the sternocleidomastoid muscle and the trachea on both sides of the neck. This helps us check for any deviation or abnormal positioning of the trachea.
- Changes in the tracheal position can occur due to lung or pleural diseases and can give us important diagnostic clues.
Apex Beat Location
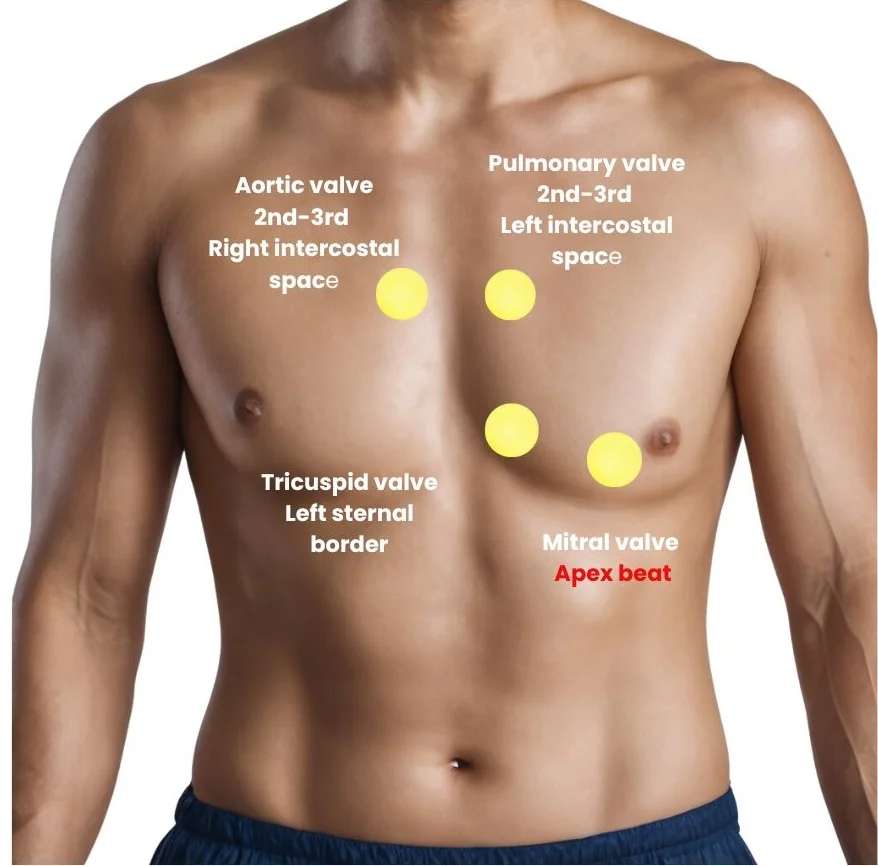
- We also palpate for position of the apex beat, which is the point where the heartbeat is most strongly felt on chest wall.
- Displacement of the trachea or apex beat may be indicative of mediastinal shift, often associated with lung or pleural conditions.
Find out the ratio of the pulse to the respiration
- Check the pulse-to-breathing ratio, which is 4:1.
- It’s a good idea to start by counting the pulse and then shift to observing breathing.
- This way, the patient may think the pulse check is ongoing while you also monitor their breath.
Chest Movement
- To assess chest expansion in the upper lung regions, we place our hands over the shoulders close to the neck.
- The thumb is positioned at a right angle to the other fingers and aligned along the midline of the chest. This is done with the examiner standing behind the subject.
- To assess the expansion of other regions of the chest, we grip the chest on either side, with our thumbs also approximated in the midline.
- When the subject takes a deep breath, we observe the distance the thumbs move away from the midline. This helps us determine the extent of chest expansion during breathing.
Vocal Fremitus
To assess Tactile Vocal Fremitus: Tactile Vocal Fremitus refers to the palpable vibration or tremor felt on the chest wall during vocalization.
When a person speaks, the sound waves generated by the vocal cords create vibrations that can be felt on the surface of the chest. Let’s learn how to do it.
- Place Your Hand:
Gently place your warm palm on the surface being examined.
Ask the person to pronounce syllables with a nasal twang, like “nine, nine, nine” or “one, one, one”.
Feel the vibrations created during speech.
- Move Across Symmetrical Areas:
Lift your palm and move it to a symmetrical area on the opposite side.
Feel the sensation while the subject continues to vocalize.
Repeat this process two or three times, noting any differences in sensations.
- Comparison Across Areas:
Compare the fremitus in different symmetrical areas.
Note that fremitus is more noticeable on the front than on the back due to the thicker muscle pad on the back.
The axillary regions on either side typically exhibit stronger fremitus.
Exceptions include the heart area on the left and the liver area on the right, where fremitus is less pronounced.
Generally, a keen observer may notice more prominent fremitus on the right side compared to the left.
The highest fremitus is typically felt over the trachea.
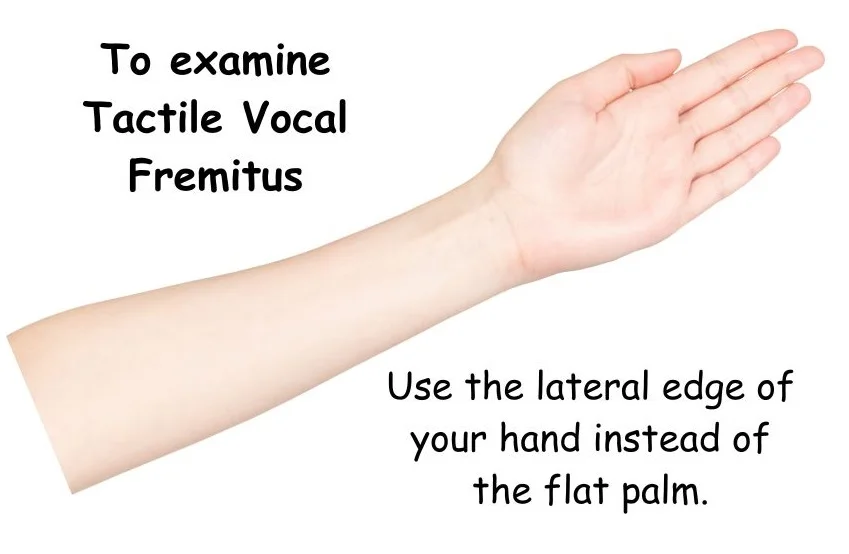
- Localized Areas:
To feel fremitus in small, specific areas, use the lateral edge of your hand instead of the flat palm.
- Demarcation of Levels:
Determine the lowest levels where fremitus is perceptible on either side.
Chest Expansion Measurement
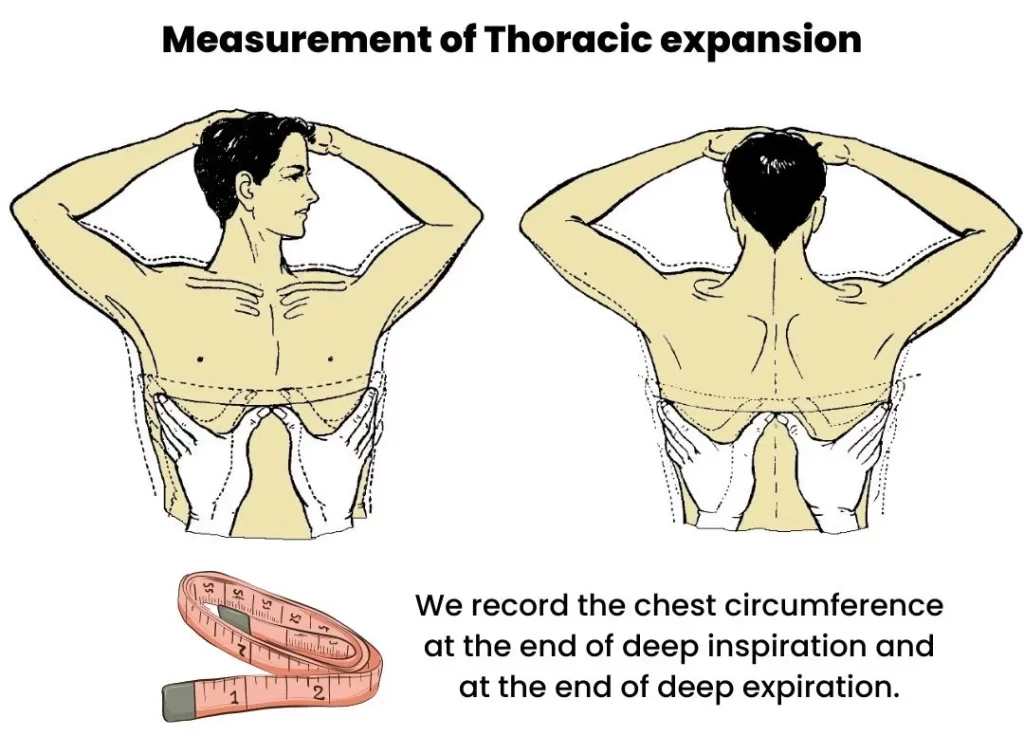
- To quantitatively assess chest expansion, we use an inch tape placed just below the nipple and wrap it around the chest with a mark at the middle of the sternum.
- We instruct the subject to take deep breaths in and out while we measure the chest circumference.
- In females, we ensure that the measurement avoids the mammary gland by taking it above or below this area.
- Typically, we take measurements after 2 or 3 breaths, as initial respiratory efforts tend to be shallow.
- We record the chest circumference at the end of deep inspiration and at the end of deep expiration.
- A normal difference between these two measurements is five to eight centimetres.
- A decrease in this difference may indicate conditions like bronchial asthma or pulmonary fibrosis.
In summary, palpation of the chest is a vital part of a clinical examination, allowing us to gather valuable information about the chest’s structure, movement, and underlying health.
PERCUSSION OF LUNGS
Percussion is an essential part of a clinical examination, and there are two main types: direct and indirect.
Let’s break down these techniques and the rules to follow in a simple way:
- Direct Percussion:
- In direct percussion, we tap or percuss directly on the clavicle (collarbone). It’s a straightforward technique.
- Indirect Percussion:
- In indirect percussion, we use two fingers of our left hand, specifically the middle finger (which we call the pleximeter finger). We place it firmly parallel to the space between the ribs.
- Next, we strike the back of the middle finger with the tip of the middle finger of our right hand (this is the percussing finger).
Here is a detailed post on method of percussion so you can accurately learn the art of percussion.
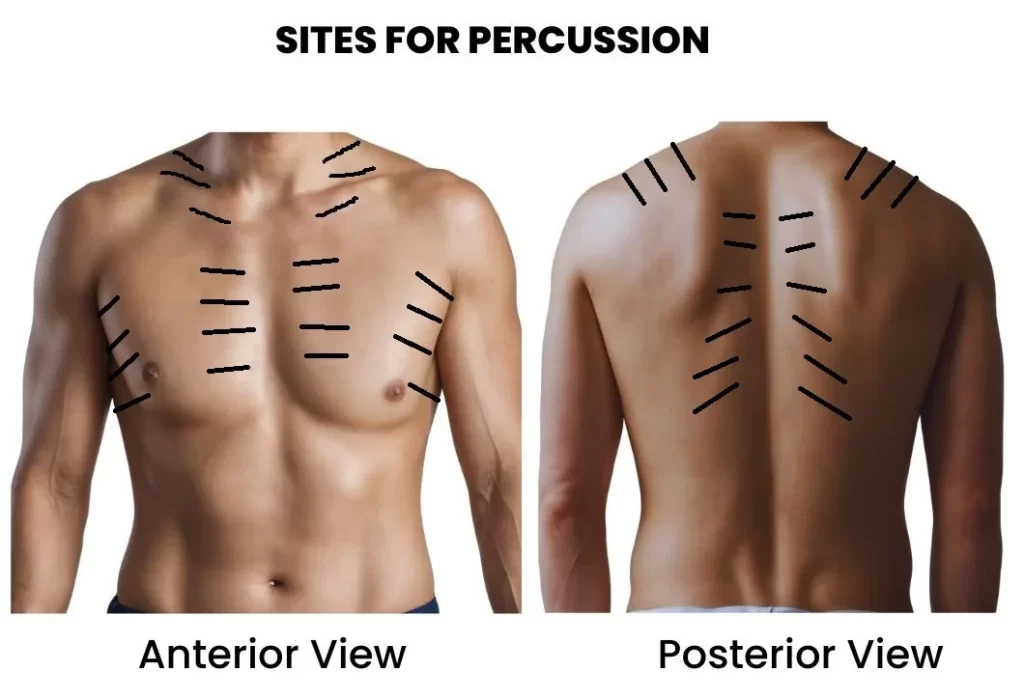
Rules for Percussion
Here are some important rules to remember when performing percussion:
Rule 1: Use Your Wrist and Finger Joints:
- When delivering the percussion stroke, make sure to use your wrist and finger joints for the movement. Avoid using your elbow or shoulder.
Rule 2: Align the Pleximeter Finger:
- Ensure that the pleximeter finger (the middle finger of your left hand) is positioned so that its long axis is parallel to the edge of the organ or area you’re percussing.
Rule 3: Start from Resonant to Dull Areas:
- Begin percussion in a resonant (hollow) area and then move towards a dull area. This helps us gather information about the underlying tissues.
Special Cases:
- When we’re percussing the sides of the chest, we ask the subject to place their hands over their head.
- For percussing the back of the chest, the subject crosses their arms in front.
- We pay attention to how sound travels because it can tell us a lot about what’s going on inside the body.
What Sounds Mean
- In some cases, lung resonance can be affected. For example, consolidations (when lung tissue becomes more solid) and fibrosis can dampen resonance.
- If the pleura (the lining around the lungs) thickens or if there’s pleural effusion (extra fluid around the lungs), we may hear a stony dullness sound.
- On the other hand, resonance can increase in conditions like pneumothorax, where air escapes into the chest cavity.
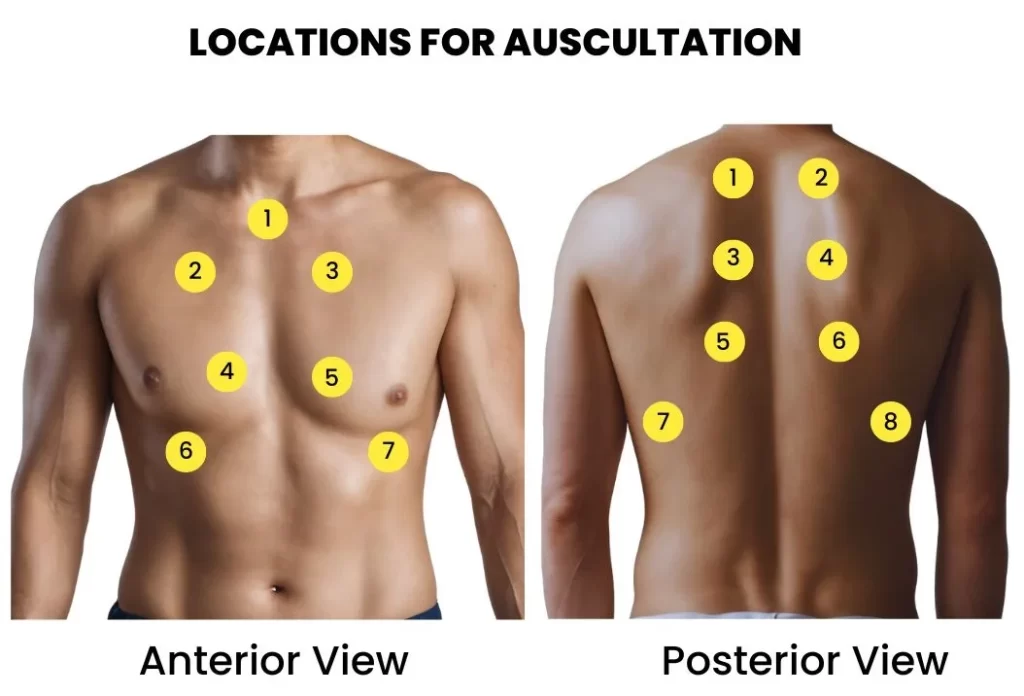
AUSCULTATION OF CHEST
Auscultation is done by using a stethoscope to listen what’s happening inside the chest.
Do you want to know how to use stethoscope and how to buy a new stethoscope for you? then follow the link here STETHOSCOPE | PARTS, USES, METHOD, TYPES, HOW TO BUY
We do this on both sides of the chest to compare what we hear.
Here’s a simple guide:
1. Breath Sounds:
There are two main types of breath sounds:
- Vesicular: These are the usual, gentle rustling sounds heard when you breathe normally. They’re low-pitched and continue during the entire breath cycle.
- Bronchial: These sounds come from the trachea and large bronchi. They’re more intense, and you hear them for a shorter duration during each breath.
2. Other Types of Breath Sounds:
Sometimes, we hear different breath sounds:
- Tubular: These are high-pitched, like bronchial sounds, but heard over areas with lung issues.
- Cavernous: These are low-pitched bronchial sounds, often heard over large empty spaces.
3. What’s Missing:
- If we can’t hear any breath sounds, it could mean there’s a problem.
- This can happen in conditions like thickened pleura, pleural effusion (extra fluid), or pneumothorax (air in the chest).
- It can also be due to issues that limit air from entering the lungs.
4. Vocal Resonance:
- This is like making your voice echo inside your chest.
- We ask the person to say “one, one, one” repeatedly while we listen.
- If the sound carries well, it could mean there’s something going on, like consolidation (lung tissue getting denser).
- If the sound is faint, it might suggest pleural thickening, pleural effusion, or pneumothorax.
5. Abnormal Sounds:
Sometimes, we hear things that shouldn’t be there:
- Rhonchi: These are like snoring sounds and happen when the air passages get narrow.
- Crepitations or Rales: These are like crackling or popping sounds, often heard when there’s extra fluid in the lungs.
- Rub: This is a grating sound, almost like two pieces of leather rubbing together. We hear it during pleurisy when the lining around the lungs is inflamed.
So, when we listen to your chest, we’re not just hearing your heartbeat; we’re also listening for these important clues to understand your health better. It’s like a secret code that helps doctors figure out what might be going on inside your body.
INTERESTING FACTS AND FAQS
Why is chest inspection crucial?
- Chest inspection provides the first visual assessment of a patient’s well-being. It involves observing the trachea, chest shape, breathing patterns, and more. These observations offer initial clues about the patient’s health.
Did you know that chest shape varies with an individual’s build?
- Indeed, a sturdy individual may have a short, broad, and deep chest, while a tall, slender person might possess a long, narrow, and flat chest. Understanding these variations is essential for accurate assessment.
What are the different types of breath sounds?
- There are two main types: vesicular and bronchial breath sounds.
- Vesicular sounds are gentle and rustling, heard throughout the breath cycle.
- Bronchial sounds, on the other hand, are more intense and shorter in duration.
What can vocal resonance reveal about the chest?
- Vocal resonance, assessed by asking the patient to repeat sounds while listening, can indicate conditions like lung consolidation or pleural thickening. It’s a valuable diagnostic tool.
Are there abnormal sounds we should watch out for during chest auscultation?
- Yes, several abnormal sounds can indicate health issues. Rhonchi are snoring-like sounds, crepitations are crackling or popping sounds, and a rub is a grating sound often associated with pleurisy.
CONCLUSION
The clinical examination of the chest is a methodical process that combines observation, touch, percussion, and listening to unravel the mysteries of a patient’s health.
From assessing chest shape to listening for subtle breath sounds, healthcare professionals employ a range of techniques to provide accurate diagnoses and personalized care.
By exploring this guide, you’ve gained insights into the art and science of chest examination, highlighting the importance of these methods in modern medicine.
Nice detailed presentation. Keep it up
Glad to hear from you…